Thursday, 29 April 2010

Bluebird of Happiness

Hi there everyone

I hope you're all having a great week so far. We have been really fortunate with the weather here the last couple of days, the sun is shining and people are smiling again. It makes SUCH a difference to everyone!

Today I'd like to share my Play Date Cafe card with you, but also a picture that I find absolutely hilarious. It really tickles my sense of humour!!   More on that after this week's inspirational picture...


and the card that I made for it.  Not my usual bright colours but I really like how it turned out.


I got to play with my new Smooch paints too, YUM-MEE!! 

Aren't they elegant?!  They look like nail varnish (nail polish) bottles!

As you can see it was quite a simple card to put together.
  1. Cut a charcoal rectangular piece of cardstock, and a smaller one in pale green, adhere to base card, matting as shown
  2. Cut a blue patterned rectangle, paper pierce the corners, mat as shown above
  3. Pop dot a die cut flourish label, attach to card
  4. Distress a printed label die cut, stamp sentiment and attach to flourish label as shown
  5. Using Smooch 'almost good enough to eat paints' paint the bird cage, then distress with distress ink
  6. Cover a chipboard bird with some patterned paper, ink edges and attach to the birdcage
  7. Yes I know, everyone puts their bird inside the cage, but to be honest I find it makes me sad seeing mine inside a cage so I put them on the outside instead!  One of my quirky traits I guess lol
  8. Finish by distressing all of the edges and adding two pearls to the top and bottom of the flourish label
I have had 'use chipboard shapes' on my cards To-Do list for a while so can tick that one off now, and also to use a bird cage.  Yay, killed two birds with one stone.  I'm sorry, that wasn't funny at all ;o) Seriously though - What's on your card making To-Do list?

Go grab yourself a cuppa, and take some time to check out the other fab creations by the rest of our awesome design team at PDCC, they have come up with some great ones again this week.   (By the way do you realise how talented they all are?  They win challenges, get published etc. etc. all over the place! Put me to shame they do, lol)  I'm really lucky they let little ole me join in on all the fun with them all each week.

Suzanne Czosek

and of course not forgetting our guest designer for this week, Jen Tapler!

Come and play along with us this week at the PDCC too, I'd really like to see how you interpret Mona's picture this week! 

Now, as promised,  before I  go I must share my Bluebird of Happiness with you!

This picture came in an e-mail to me a while ago.  I'm not sure if you can make out the words, but it says, 'Do I look like the blue bird of happiness'?!!!  Tee hee!!! LoVe it!!


Hope it makes you smile too!

Die Cuts: Amy Butler Faded China
Paper: Amy Butler Faded China 12 x 12 pad, Bazzill Cardstock
Accessories:  Tim Holtz 'Shabby Shutters' distress ink, Maya Road chipboard birds, SU! paper piercer, pearls from stash


Monday, 26 April 2010

A bit of the old

Hey there everyone

Tonight I have a quick card to share with you. I promise I will start posting longer posts when I get chance to!

This card is for the challenge over at Daring Cardmakers this week, 'Die Cut Crazy' to use something with a die cut.  Well, now where do I begin?  I'm a die cutter queen lol (only joking!) but seriously you all know how much I love my die cutters!!!  I didn't have a clue what to make, the list was endless!!!

I was sure that the theme had to include some recycling, so I used some recycled lined paper that I aged,  but I've read that many blogs this week I guess I must have muddled it up with another one.   A bit different to my normal style but sometimes it's nice to mix it up a bit. 

Have a chilled out day/evening!


Thursday, 22 April 2010

Phew, what a week and some more fun over at PDCC!

* Edited * Please scroll down for challenge entries....

Sorry for the lack of postings this week. We had water pouring through the ceiling last Friday, and since then have had no heating, no hot water, and having to flush toilets with buckets of water. We now have flushing toilets so have made some progress :o) That's just one thing that's gone wrong this week, there are many more but I won't bore you with them! As you can see there has been a lack of postings this week as a result of all the mayhem! I've actually got lots of things to show you, but for now I would like to share my Play Date Cafe Challenge card.  

This week we have guest designer, Jen Tapler, joining us! 

We are also being sponsored by Mod Podge Rocks!


They are giving you the opportunity to win this fab prize...


And here is my take on the colours.... or colors, depending where you live ;o)


I really had to rack my brains for this challenge.  I was thinking along the lines of jewellery, but couldn't find anything that worked.  I then thought maybe some make up, a little grey make up case with turquoise, terracotta and peachy coloured eyeshadows.  Nope, that didn't work.  I ended up opting for this!  The little silver pearls remind me of those little beads you put on top of cakes, yummmmy!

Here are the card details;

1. Spend a couple of minutes deciding the best way to emboss the circle, cut it first or emboss it first?  What do you do??  I couldn't make my mind up!  Once you've done that either cut out a circle in pale peach and emboss or emboss and then cut out the circle, your call.
2. Cut out the scallop shape in terracotta, attach the embossed circle to finish
3. Cut out a square in the putty coloured card and then another in pale peach, attach to card base
4. Tie ribbon around the circle before pop dotting onto the card
5. Cut out the 'glam girl' sentiment and stick directly onto the embossed circle
6. Cut out the shoe and nail varnish bottle, doodle on as appropriate and attach to the card
7. Attach the yummy cake decorating silver pearls

Dies: Sizzix Circle #1 and Scallop, Sizzlits 'Nail Polish', 'Phrase, Glam Girl', 'Shoe #7'
Paper: Terracotta, turquoise, putty and pale peach Bazzill cardstock
Accessories:  Silver pearls from stash

As usual the rest of the design team have come up with some brilliant interpretations of this week's colour challenge, so do pop over to them to say hi and see what they've done.  I love being on this design team, they are all so talented!


*Edited* Challenge Entries - Unscripted Sketches #51 & FTL #86

Just a little extra tonight, I had made some cards for some challenges, so thought I would share them with you.  I haven't had a minute to do any of the card details so if you would like them just drop me an e-mail, but at least I can post something for you!


I made this card for the Unscripted Sketch challenge which I now realise I've missed the deadline for!  I thought it was Thursday deadline.  (this week really isn't going very well!)  Oh well, it doesn't matter because  I have never really done the torn paper thingy on a card yet, so I thought I'd give it a go, and I'm really pleased with how it turned out.  Using my FAB Amy Butler papers, and the medallion die cuts, I put this card together so quickly.  You could use it for thank you cards, birthday, get well etc. etc.  I think I will return to this sketch over and over again.  I love it!


I made this card for the Clean and Simple Fall to Layout sketch this week.  This card was really good fun to make.  I just stamped out lots of butterflies on different patterned papers and sat with a pair of scissors to cut them out, love it!! 


ps - go and check out Sav's blog, she is running a Growing with Unity week. If you leave her some love you might win a prize!

Hopefully I will get time to share some more cards over the weekend :o)


Thursday, 15 April 2010

Black, White and a Splash of Orange

Hey there!

It's challenge day over at the Play Date Cafe today, so make sure you pop over and have some fun. This challenge was an interesting one for me, black, white and only a splash of orange. Scary! I usually only do colour, colour, colour! My original card idea was absolutely nothing like this.  I was going to go for animal print, but then I changed my mind at the last minute.  Actually, it turned out better than I expected, but I enjoyed adding the orange on the card the most. I'm sure you'll understand why if you follow my blog and see all the bright colours that I normally use!  I know PDCC is a challenge blog, but Sarah..no colour?!!  Now that is a challenge for little ole me!!


Here is the card that I came up with..  The orange actually looks brighter in real life... now there's a surprise lol.

Here are the card details
  1. Pour yourself a drink, you will need one if you don't normally work with no colour!
  2. Cut out a black square, mat with black and white paper and adhere to the card base
  3. Cut out a black rectangle to put your nestie label onto
  4. Stamp your yummy 'You are fabulous' sentiment, colour in heart with orange Copic
  5. Using nesties cut out the sentiment, and cut a scalloped border in orange, stick together and raise using pop dots
  6. Using Martha Stewart punch cut out black border, and some black and orange butterflies
  7. Stick orange butterflies directly onto sentiment label, then fold black butterflies down the middle and attach.  Lift their wings to give them a 3d effect
  8. Add swarowski crystals to each corner of the sentiment label, and an orange crystal on the last butterfly of the border
  9. Attach black butterfly border, raising alternate butterflies
  10. Grab some coloured paper so that you feel back in your comfort zone again, and be proud of yourself for rising to the challenge!
Dies: Nesties
Stamps: Ippity
Paper: Black and orange Bazzill cardstock, Basic Grey paper from stash, think it's Scarlett's letter,
Accessories:  Swarowski crystals, Martha Stewart punch

I'm really looking forward to seeing this week's entries.  I might learn some ideas of how to do monochrome as it should be done!

Pop by all of the DT's blogs and leave them some lurve.  They will all love your comments just as much as you do I'm sure.

Suzanne Czosek

and of course our guest designer, with a fab set of stamps for a giveaway!

Have a fantastic day and join in on the fun! 


Wednesday, 14 April 2010

CPS Card Challenge

Happy Wednesday!

Again another very quick posting. I will write more when I get chance I promise, it's just full on at the minute!

I made this card for the CPS card challenge. This card was very quick to make because I used some Basic Grey pre-cut sticker embellishments from the June Bug paper range.  For the stalk of the flower I used a new Ippity stamp.  I will have to tell you about that later though as I need to dig out the name for you!


Have a fab day and I hope to be back later to share another card :o)

I've gone all dotty!

Hello!  'Tis me again!

Here is a card that I made for the Get Sketchy challenge.  I LOVE dots so when I saw this sketch it just had to be be done. 

So here is my card...  I just LOVE the yellow, red and navy together in this Basic Grey 'June Bug' range.  Isn't it a fab sketch?!!

On Saturday I went along to an Art Journalling workshop run by Sarah Anderson, one of the senior designers of the Play Date Cafe over at The Stamp Attic.  It was SO much fun!  I brought Natasha (Tink) with me and we had a great time playing with paint and generally getting very messy!  Sarah is SO lovely!  All of the DT are based in the US, it's just Sarah and I that are over here, so it was fab to meet her in person!  Sarah is going to share some photos tomorrow I think so I will come back and tell you more about it later this week.  I might even share a couple of my beginner pages with you, if I'm brave enough!  Speaking of Play Date Cafe the challenge for this week is nearly at an end, but you do still have time to enter so pop on over and show me what beautiful creation you can come up with using this week's challenge colours!

For this card I wanted to play with my new June Bug Basic Grey papers (which you will be seeing a bit more of!) Ooh these papers are just too yummy for words!! I also bought some of the new Tim Holtz die cutters from The Stamp Attic when I was over there. I LOVE that shop, it's not far from me and I didn't even know it was there!! My poor bank manager is going to be cursing the day I came across it!

Now if you look closely you will see a fancy label that I matted the sentiment on.  I came up with the idea of using the Tim Holtz border die as a label cutter.  Unfortunately I am absolutely hopeless at cutting small straight labels so my gorgeous, wonderful Ian (I have to big him up!) very kindly cut me out the fancy label.  Doesn't it look great though?!  I was so pleased with how it turned out.  I love it when you find other ways to use your crafting goodies! What different ideas have you come up with to use your goodies in other ways?

Dies: Nesties circles, Tim Holtz 'Tattered Florals' & 'On the Edge' Sizzix dies
Stamps: Woodware 'Jane's Script' sentiment
Paper: Bazzill cardstock, Basic Grey 'June Bug' 6 x 6 paper pad
Accessories: Kaleidacolour Creole Spice inkpad, Brilliance Aurora ink pad

That's it from me for now, my bed is calling me!  Back soon though!


Tuesday, 13 April 2010

Very quick posting!

Hi everyone

It's been a manic few days. How's your week going??

This is just a very quick post, but I wanted to share a card with you today while I have a minute to spare!  I hope to be back later with a few more, but it will depend on how the day pans out!

This is a very quick and simple card that I made for the latest Card Patterns sketch. The paper from Basic Grey just does all the talking for itself - I am in love with those bright colours!!!  I turned the sketch on its side for my card.  Actually looking at it now it's not much like it, but if you look at the top right of the sentiment label you will see that there is a tiny heart on there, that's supposed to be the circle on the sketch lol.  It's all there, you just have to know where to look for it ;o)You may not be able to tell but there is a large block of paper at the top, then the red patterned strip at the bottom.  The sentiment says, 'It's ok to have everything you want' lol.  I hope that includes lots of papercrafting goodies!!

Enjoy the rest of your day.  Back soon! 


Thursday, 8 April 2010

Take Time to Smell the Coffee

Hey there everyone!  Hope you're having a good week.

It's challenge day over at the Play Date Cafe challenge blog.  Another week's gone by, was I asleep?! I must be getting old, time is definately going by a lot quicker than it used to!

Ok, so enough chit chat from me. Here is my card for the week, plus details of the latest challenge.


The colours this week were created by Mona.  Gorgeous colours, we all need a bit of spring right now after the winter we've had, don't we?  Well that is if you're not in a part of the world that is in a different season!!

Hands up if you love coffee?!!  I do, and drink a little bit too much of it really.  This week we have a 'celebrity' guest designer and sponsor, Kristen Powers, from KPink.  As part of the challenge we could use one of her digi images. Now me being the caffeine addict and all that I decided I would definately give it a go with this cute little cup and saucer. Check out her blog for her designs, they are lovely!  I have got my eye on the little girl with the plaster, and those yummy owls.  Which ones do you like?

So then came the next challenge, from Sarah, one of the senior DT, to see what we could come up with, whether it was colouring with pencils, copics, paints etc. paper piecing, copics, prismacolour, inks (ink image and paper piece), coloured paper paper pieced, crayons, watercolour paint, acrylic paint, software program... I decided I would do some paper piecing. I'm always saying I will give it a go, but never do. That's what these challenges are all about, right?  To push us out of our comfort zone?  What fun! I had a great time playing with this over the weekend. This card definately didn't take me 10 minutes, more like 10 hours lol. No seriously though, I spent so much time playing around with different ideas that I couldn't tell you how long it took, but I had a lot of fun! It was nice just sitting playing with a pair of scissors and cutting out little bits of paper, very therapeutic, must be something to do with when I was a child lol.

Here are the card details
  1. Get out lots of patterned paper, a pair of scissors and play.  Enjoy the creative process!
  2. Print digi image onto white cardstock and paper piece with patterned paper/plain cardstock
  3. Cover card base with lavender cardstock
  4. Cut out two squares, one in cream, the other in plum
  5. Adhere plum square directly onto card base
  6. Attach ribbon to lavender square before pop dotting onto plum to add dimension
  7. Die cut a circle and scallop in lavender and plum, as shown
  8. Assemble and attach scallop circle, adding paper pieced digi image
  9. Stamp sentiment, cut into a square label and attach to card
  10. Using liquid applique add foam to the coffee to bring it to life, heating the foam until it looks frothy.  Add some to the side of the cup to look as if the foam is overflowing
  11. Put the kettle on and make a cuppa, all that hard work deserves a coffee!
Dies: Sizzix 'Circles #1', 'Scallop'
Digi Image & Stamps: KPink coffee cup, Impression Obsession stamps 'Smell the Coffee'
Paper: Bazzill cardstock, plum 'velvet' paper from local craft shop 
Accessories:  Basic Grey pad, white liquid applique, ribbon and purple pearls from stash

You may not be able to tell from the photo but the plum 'paper' is actually velvet in texture, which gives it added dimension. 

Don't forget to check out the rest of the talented design team's projects ....


Ciao for now!

Tuesday, 6 April 2010

Home Sweet Home

Mmmm, 'Home Sweet Home'... My Marmie always says, 'It's not a house, it's home'!  We've been living here nearly a year now, but it's funny how it takes a while to settle in and eventually call it your home.

I made this card for the Card Patterns Sketch Challenge #58.

When I saw this challenge I had a few ideas of what papers to use, but decided to make a new home card with these ones.  As you can see I've moved the label over a bit.  That was only because I wanted to use my wide red ribbon, otherwise I would have left it where it should have been!  For once I've actually pretty much followed the sketch ;o) 

I LOVE this pad of papers by K & Co, so much so that it's nearly finished :o(   Any excuse to go shopping for papercrafting supplies though!  :o)

I had a go at paper piecing over the weekend, so I thought I would apply the same kind of technique to this card, but using die cuts instead.

What conjures up 'home' for you? It's quite a difficult one to describe, isn't it? It's that feeling of when you walk through the door at the end of a long day and breathe a sigh of comfort. It makes me think of my little Lulu (dog) wagging her tail the minute I get in as if she's not seen me for months when it might have only been half an hour!   It's knowing you can be completely at ease.  For me that means bundling all my hair on top of my head and tying it up with a clip like Pebbles in the Flintstones, as I'm often called at home by Ian and Natasha! 


It's about being surrounded by people that love and care for you, and you them in return.  Then it's the other little things like the smell of fresh coffee (in my case Caramel or Vanilla flavoured!), flowers in a vase on the window ledge, and a freshly made bed.  Sometimes it's nice to take time out to just think about the little things of life, don't you think?

Dies: Sizzix 'Home Sweet Home #2', Nesties label
Card:  Bazzill cardstock
Inks: None (sentiment printed on computer)
Accessories:  Yellow sticker by Mei Flower, wide red ribbon from stash

Have a great day/evening :o)


Monday, 5 April 2010

My Mad Owl!


Happy Monday everyone! The sun is out at the minute so everyone seems much happier! It's not that warm but it feels more like Spring!

The card I would like to share with you today is a fun one using some new Unity Stamps that I got from Sav who is on the Play Date Cafe design team with me. I kept being inspired by her stamped cards and so ordered some to have a play. As my daughter said, 'Mummy, you ended up using three of them on one card'!! They must be good! I had such fun with this simple card. The ideas came together quite quickly and I think the sentiment is so funny. Here's my mad owl ...!  This owl does have a bit of style about him in the form of bling.  The little orange stickers I added (and the green ones for his eyes) are sparkly but that's not really showing on the picture unfortunately. 

I made this card based loosely on the CPS Sketch #160 below which I think I have just missed, but I still wanted to share it with you.  The owl really makes me smile, he just looks totally mad!

Dies: Sizzix 'Dingbats #1'
Stamps: Unity
Card: Unity and Bazzill cardstock
Inks: Brilliance Pearlescent Chocolate
Accessories:  Prima flowers, Basic Grey brad

Quick question - What silly things makes you smile??

Enjoy the rest of your day! ♥


Thursday, 1 April 2010

Chase Away The Blues!


Happy day everybody!!! It's nearly Easter, yay! We get a few days off soon, but more importantly there will be chocolate involved!!  Now that's my kind of weekend!!

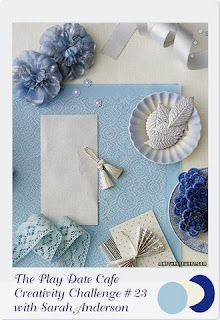
Today it's Play Date Cafe Challenge day! This is the inspirational picture from Sarah, one of the Senior Designers on the team...The colours this week are pale blue, royal blue and cream.
I thought I would find this challenge a bit tricky because most of the cardstock that I use is white.  I started scribbling down a few ideas when I first saw the pic but that all changed when I bought my nice new shiny Martha Stewart punch :o)  I am in lurve!   As soon as I punched one strip out in card I totally changed my mind about what I was going to do and I had the card pretty much put together in about 10 minutes!!  Quite a rarity for me I can tell you!  The little punched butterflies were punched from another MS punch that I will show you later.  I know, I was naughty but it was calling for me to buy it ;o)

We have a fab guest designer over at the PDCC this week..  Arielle Gordon .. She is a past PDCC winner.  Pop over there and see her work, and of course the rest of the design team below;


Their designs are great, all so different but all fab!   I'm the host of the challenge this week so you get to learn a little bit about me too, scary!

Here are the card details
  1. Scribble out loads of sketches and then throw them away when you buy yourself something nice and new that inspires you more!
  2. Cut a piece of pale blue card, emboss and attach to the card base
  3. Cut and punch two border strips using the hole punch, layer one over the top of the other
  4. Stamp the sentiment before sticking to the blue card base
  5. Add a royal blue strip to separate the embossed section from the scalloped border
  6. Die cut the flowers, for the cream flower cut from the outer petals into the centre to give added dimension, finish the centre of the flowers with a brad and attach using pop dots
  7. Punch some blue and cream butterflies and adhere to the embossed section
  8. Pat yourself on the back for making a card in about 10 minutes..amazing!
Dies: Sizzix 'Flower Layers #5',' Flower, Daisies', Cuttlebug 'Floral Fantasy' embossing folder
Stamps: Penny Black
Paper: Bazzill cardstock in blues and cream
Inks: Nick Bantock 'Lamp Black' ink
Accessories:  Basic Grey pad (possibly from Euphoria?), MS 'Double Loop Around the Page' punch, MS Pop-Up Butterflies border punch

I called this title 'Chase away the Blues' because our weather is rubbish again here.  It's been raining on and off all day and it's really quite cold again.  The weekend's not looking that great either.   Everyone seems so fed up with it, it makes them grumpy!  So we thought we would liven things up at our house today.  I had been reading recently that there is a laughing group that literally spend a few minutes laughing to relieve stress.  They start off laughing in a false way, and then it becomes so catching that everyone starts laughing.  We decided to give it a go over breakfast this morning.  It's hilarious!  It doesn't matter how much you try not to find it funny, you simply can't help yourself, and before you know it everyone's giggling their head off!!  Go on, give it a go... you know you want to!!

Anyway, enough of me waffling on.  Go and join in on the fun with the Play Date Cafe Challenge this week, I'd love to see your ideas.  The challenge isn't just limited to cards either, we've had all sorts of art too.

Have fun!!


Blog Design By -Lindsey Joy Design- ©All Rights Reserved